


How to Build a Safe Reptile Enclosure: Using Expanding Foam
Welcome to the thriving jungle of DIY terrariums, where creating a Safe Reptile Enclosure using expanding foam is an adventure in itself! Are you ready to transform a bland glass box into a reptilian paradise? With a dollop of creativity, a dash of patience, and our trusty guide, you’ll become a maestro of habitat design. Whether scaling the heights of a rock wall or navigating the nooks of a tree root maze, your scaly pals deserve the best. Let’s get sticky and start building their dream home!
Choosing Safe Expanding Foam for Reptile Enclosures
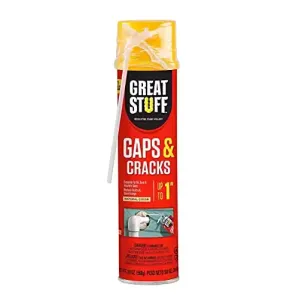
Let’s dive into the *vivarium vogue* and talk about crafting the ultimate pad for your scaly sidekicks using *expanding foam*! Now, not just any foam will do; we’re on the lookout for stuff that’s as safe for reptile habitats as a cozy burrow. First thing’s first, when you’re on the *search* for foam, always, and I mean, always aim for the *food safe* grade. This is the crème de la crème of spiffy choices in the reptile furniture world, as it means no nasty chemicals will rain on your reptile’s parade.
Scouring your site, be it a brick-and-mortar or an online jungle, for spray foam that’s labeled as safe might seem like finding a chameleon in a kaleidoscope, but it’s totally doable! The trick is to sift through the jargon and find the ones that boast being free of toxic substances – these are your golden tickets. When you’ve got your hands on the can, remember, it’s not just about the spray – it’s about the safety dance too. Once it’s set, expanding foams should be *resilient* and adulthood-ready, just like your reptilian buddy fresh out of the egg.
Now, watch it expand – no, not your reptile, I’m talking about the foam! It’s like watching a magic show in your very own enclosure-building bonanza. This foam transforms from a humble spray to a fortress of comfort and style for your cold-blooded companion. So, make sure your choice reflects your dedication to your reptilian roomie’s welfare. With careful selection and a dash of DIY spirit, your reptile’s residence will be the talk of the terrarium town!
How to apply spray foam:
- Read the instructions on the foam canister carefully before use.
- Wear protective gloves, safety glasses, and old clothes as expanding foam can be difficult to remove.
- Ensure the area to be filled is clean, dry, and free of dust or debris for the best adhesion.
- If you are filling a large gap, apply the foam in layers and let it cure between applications.
- Shake the foam canister well before use to mix the contents properly.
- Test the foam on a scrap piece of material to get a feel for its expansion rate and curing time.
- Use a foam gun or nozzle for more precise control over the application. This can also lead to less waste.
- Apply the foam slowly and steadily, as it will expand to fill the space.
- Do not overfill the gap or crack, as the expanding foam will continue to expand after application.
- Wet the surface slightly before application if the instructions recommend it, as moisture can help the foam cure.
- Keep the can upright during use to maintain the proper flow of foam.
- Immediately clean up any accidental foam spills with acetone if it’s still wet, or mechanically remove once cured.
- Be aware that some foams can expand up to three times their initial volume.
- Allow the foam to cure fully before trimming any excess with a sharp knife or saw.
- Use a foam gun cleaner to clean out the gun or the application straw after use to prevent clogging.
- Store the canister in a cool, dry place and use it within the recommended shelf life.
- Be conscious of surrounding materials as some foams can cause damage or discoloration.
- For larger projects, consider using a two-part spray foam kit for a more expansive and controlled application.
- Always ensure proper ventilation during and after application to avoid inhaling fumes.
- If the expanding foam comes into contact with skin, remove it as quickly as possible following the manufacturer’s recommendations.
Creating a Gecko Vivarium with Food Safe Silicone and Expanding Foam
Welcome, reptile keepers and DIY enthusiasts! Get ready to transform your love for leopard geckos into an epic crafting adventure. Imagine a lush, intricate gecko vivarium, crafted by the magic of your own hands, where your scaly buddy can lounge and explore. Now, with a squirt and a smear, let’s dive into the *world of construction*, using food safe silicone and expanding foam to create *the ultimate* leopard gecko habitat. Here’s the scoop: to ensure your gecko’s health and happiness, only the safest materials should grace the insides of your reptile enclosure, and that’s where food safe silicone sealant comes in. It’s the superhero that binds everything together, keeping those pesky toxins at bay.
Next, we add texture worthy of a reptilian royalty! Crafting the perfect foam background can be as adventurous as a jungle expedition. With expanding foam, you can design elaborate landscapes that mimic natural habitats. Think rocky outcroppings and lush hideaways, turning your reptile enclosure into a *bioactive slice* of paradise. Just remember, when it comes to safety, nothing but food safe will do for your little critter’s kingdom. Make sure every crevice and corner is sealed with silicone sealant to protect your leopard gecko from unwanted chemical exposure.
For all you aspiring stylists of styrofoam backgrounds, here’s a hot tip: patience is key. Let your food safe, silicone-secured masterpiece dry completely before introducing your gecko. Once done, you’ll be the proud creator of a bioactive leopard gecko vivarium that’s not only safe but utterly enchanting. Congratulations, you’ve mastered the art of building a gecko paradise with **expanding foam** and food safe silicone – now watch your reptilian friend thrive!
And there you have it, fellow herpetology enthusiasts! By sculpting a labyrinth of basking rocks and creating hidey-holes using expanding foam, you’ve not only crafted a stunning replica of a reptile’s natural habitat but also ensured a fortress of safety for your scaly pals. Remember, the key to a happy reptile is a secure and engaging environment. So go ahead, unleash your inner artisan, and watch your reptilian roommate thrive in the marvelous enclosure you’ve constructed. Never has the intersection of creativity and responsibility been so rewarding or looked so spectacular!
FAQs
How do I ensure the expanding foam I use is safe for my reptile's habitat?
Hold onto your safari hats, because safety is key! When it's time to scour the market, aim for the crown jewel: food-safe grade expanding foam. This royal selection keeps your cold-blooded compadres away from the not-so-spiffy chemicals, as it's free of toxic substances. And don't forget those labels – they’re your treasure map to a safe reptile enclosure!
Can food safe silicone be used in constructing a leopard gecko vivarium?
Absolutely! Food safe silicone is like the superhero of sealants, swooping in to bind your imaginative creations. It shields your gecko from villainous toxins, ensuring their home is not only a visual feast but a toxin-free zone as well. Plus, it's the secret weapon in keeping your DIY world glued together, literally!
What kind of texture can I add to my reptile enclosure using expanding foam, and how does it benefit my pet?
Unleash your inner Michelangelo and add a texture that's fit for reptilian royalty! With expanding foam, your imagination is the limit. Design rocky cliffs, create lush hideaways, and conjure up a bioactive slice of reptile paradise. These textures offer real-life challenges and entertainment for your pet, encouraging natural behaviors and making their lives incredibly exciting!
How long should I wait after constructing my reptile's habitat before introducing them to their new home?
Patience, young grasshopper! After constructing your bioactive masterpiece and sealing it with the might of food safe silicone, allow it to dry completely. This can be a test of your DIY endurance, but it's crucial for ensuring that everything is set and secure. Once it's fully dried and aired out, you’re ready to roll out the red carpet for your reptilian royalty. So take a bow, because you've just become a master habitat designer!


